How to Play Traksly
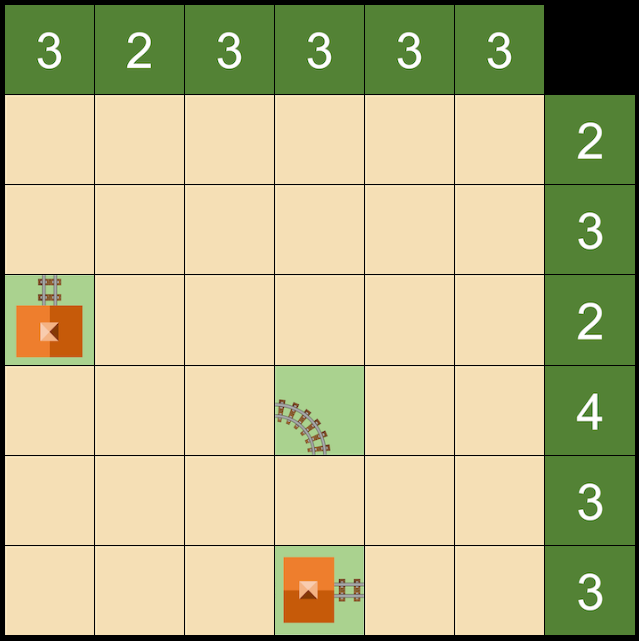
Connect the stations using the tiles provided. Ensure that the track does not cross over itself. The number of track sections used in each column and row must match the numbers shown above each column and to the right of each row. Ready to get started?
Getting Started
Your game begins by displaying the two stations. One or more track tiles may have already been placed for you.
What Do The Numbers Mean?
The numbers above the grid show how many track pieces are needed in each column. The numbers to the right show how many pieces are needed in each row. Use your wits to figure out where they all go!
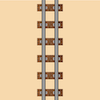
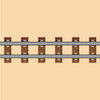
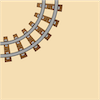
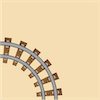
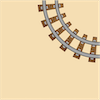
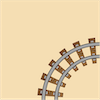
Track Tiles
There are six types of track tiles to choose from:
Logic Tiles
To help you out, we provide two types of logic tiles:


Use the
tile when you're sure a space must have a track piece, but you're not sure which one yet.
Use the
tile when you're certain a space can't have any track.
Logic tiles are helpful aids to track (pun intended) which cells contain track pieces and which do not. However, you don't need to use them to solve the puzzle. In fact, for easier puzzles, you might find that you don't need them at all.
Example Walkthrough
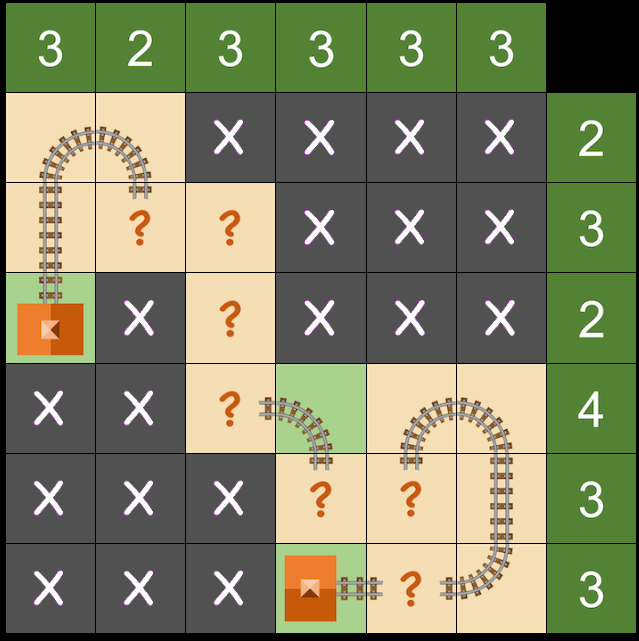
Step 1: Start with the Known Pieces
Let's begin by adding a tile to the ends of the known track pieces.
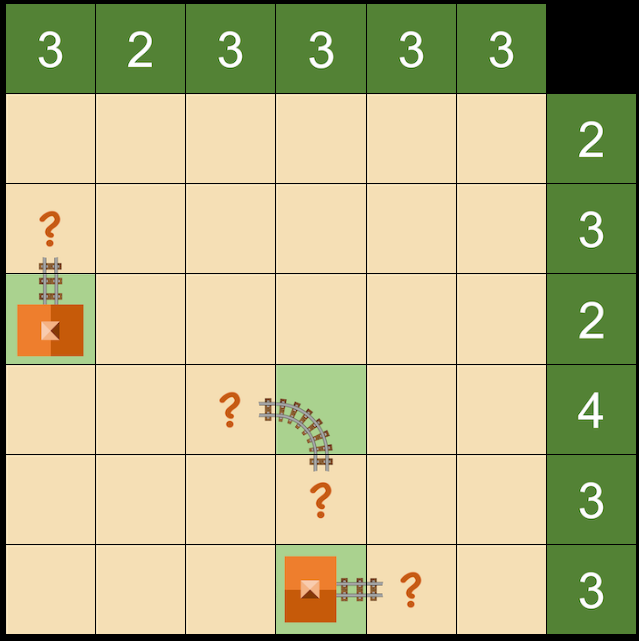
Step 2: Identify Completed Columns
With the tiles placed, we see that column 4 has a full complement of three track sections. The tile in this column indicates that some track must go there, even if we don't yet know which specific tile to use. Thus, we can count it as one of the three required pieces in that column. We can then fill the remaining cells in this column with
.
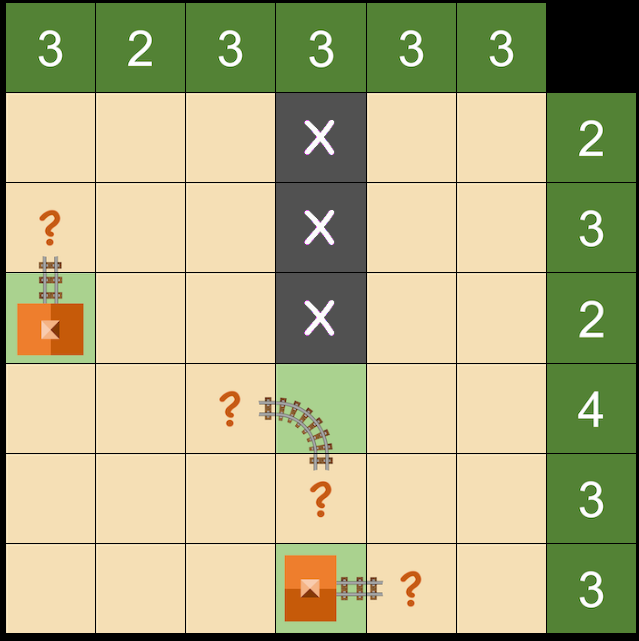
Step 3: Solve the Bottom-Right Corner
We know that the bottom-right cell must be track because two of the required three track tiles are already identified. The bottom corner is the only possible location for the third track tile. Why? Because placing any track tiles in any of the other open cells would also require a 4th piece. Place a in row 6, column 6.
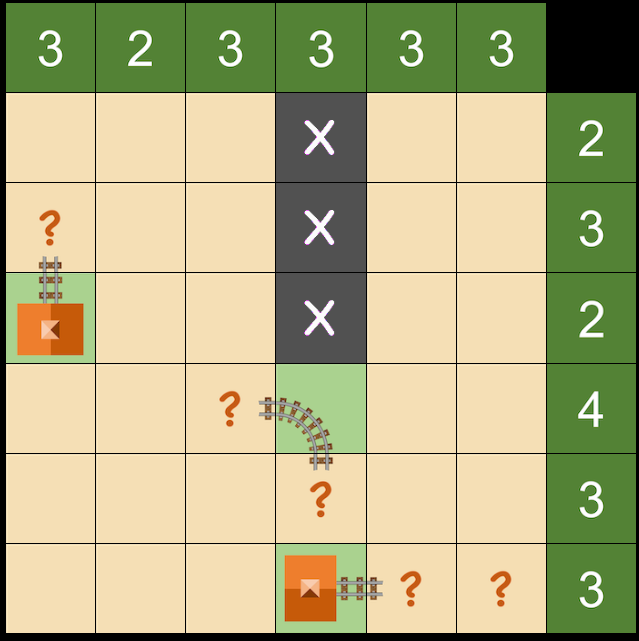
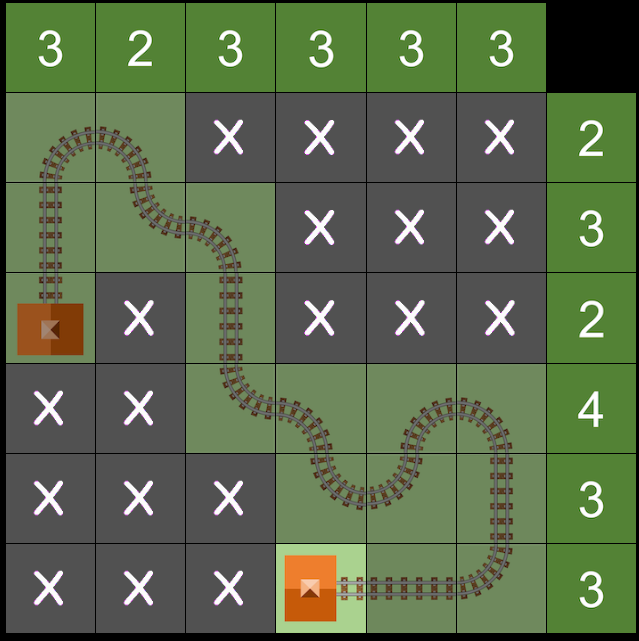
Step 4: Identify Corner Tiles
This placement gives us another for free, the one directly above the corner cell. The only possible tile for the corner is one that connects left and up. Place the corresponding track piece there. We can apply the same logic to the top-left corner as well.
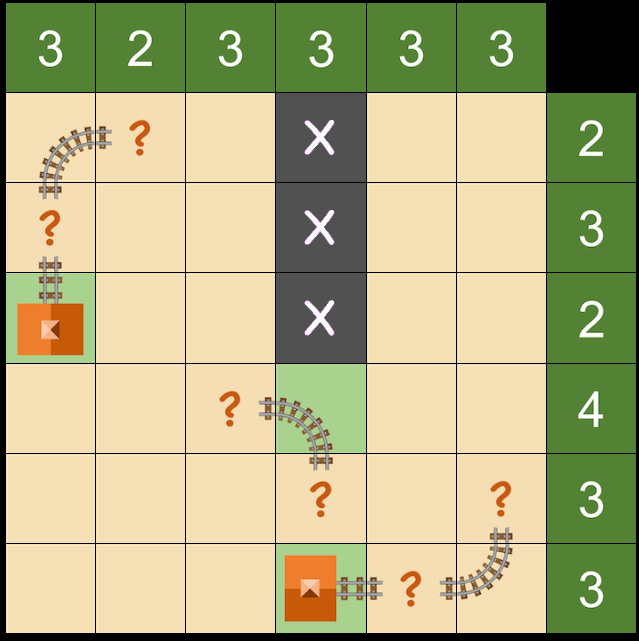
Step 5: X-out Completed Rows
Look at the tiles we have identified so far. Rows 1 and 6 now have the required number of track tiles. Let's out the remaining cells in those rows.
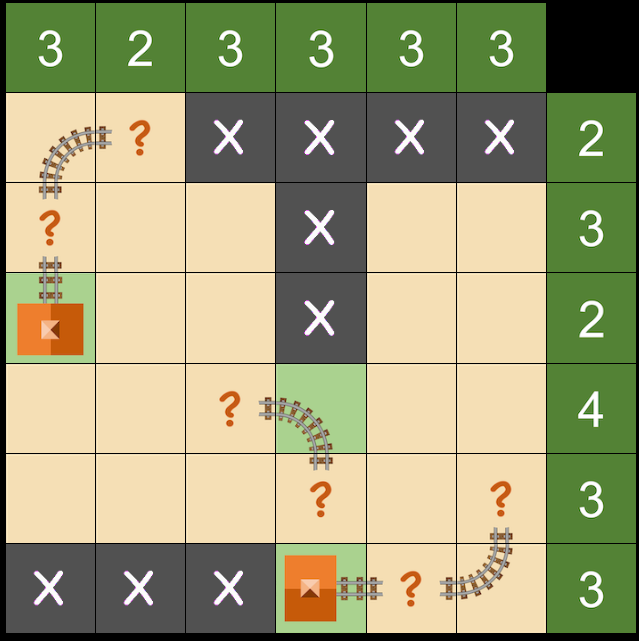
Step 6: More Corner Logic
For row 1, note that the cell in row 1, column 2 is in now in a corner. There must be another track piece immediately below it. Place a there and add the appropriate curved track above it.
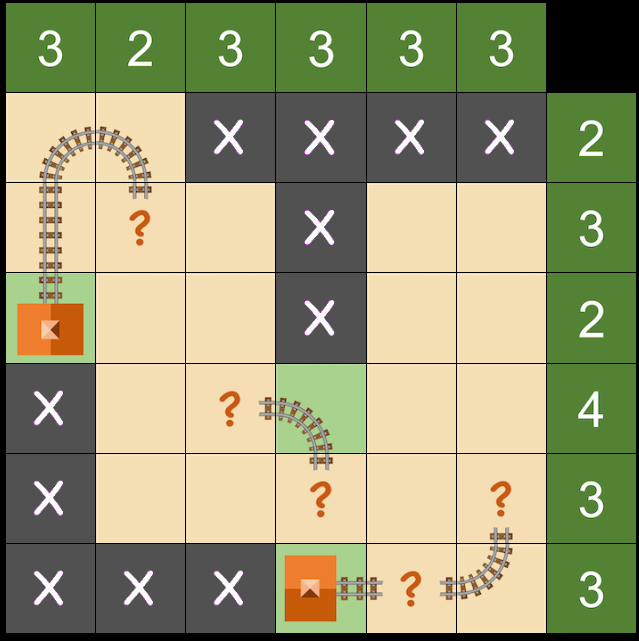
Step 7: Complete Column 6
Let's look at column 6. At first, it may seem that we don't know which cell contains the last piece of track for that column, but we've seen this situation before with row 6. The only cell that does not necessitate an additional piece of track is the one right above the one in row 2. Let's put a there and out the others.
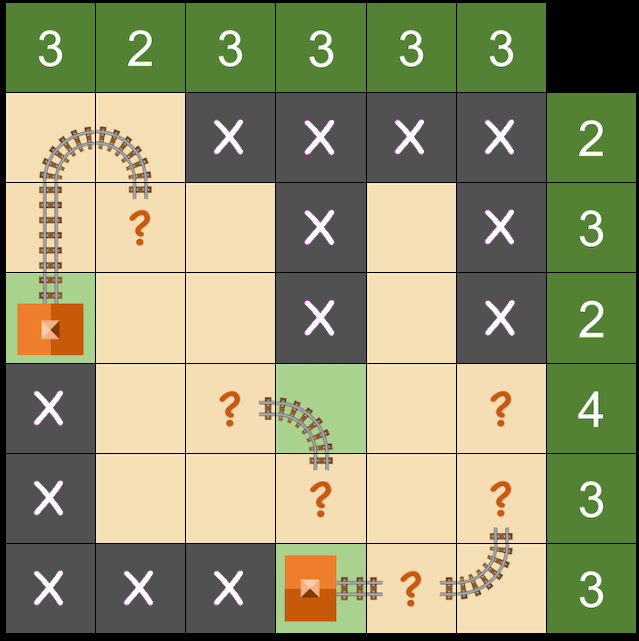
Step 8: Deduce Track Entering Column 5
The we just added in column 6, row 4 must connect to the cell to its left. Place a there and replace the with a curved track tile.
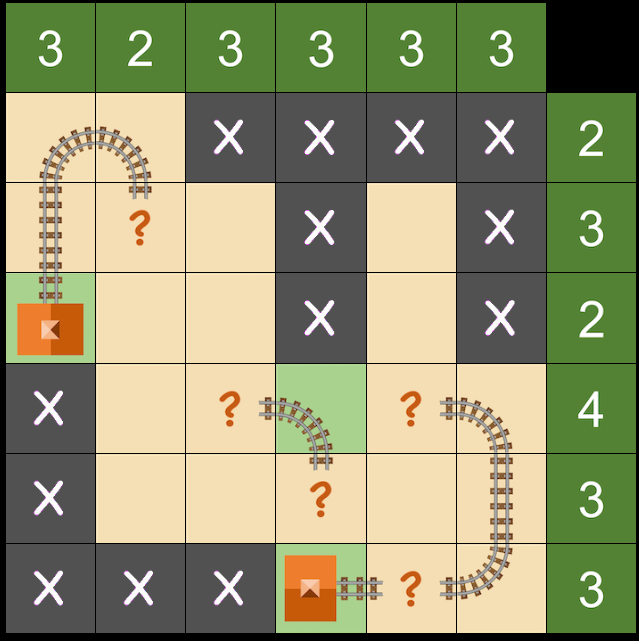
Step 9: Identify Dead Ends
Notice a dead-end! Track tiles cannot go in column 5, rows 2 and 3 because the track can't double back. Mark these cells with . The track in cell at row 4, column 5 must bend down as it is now in a corner.
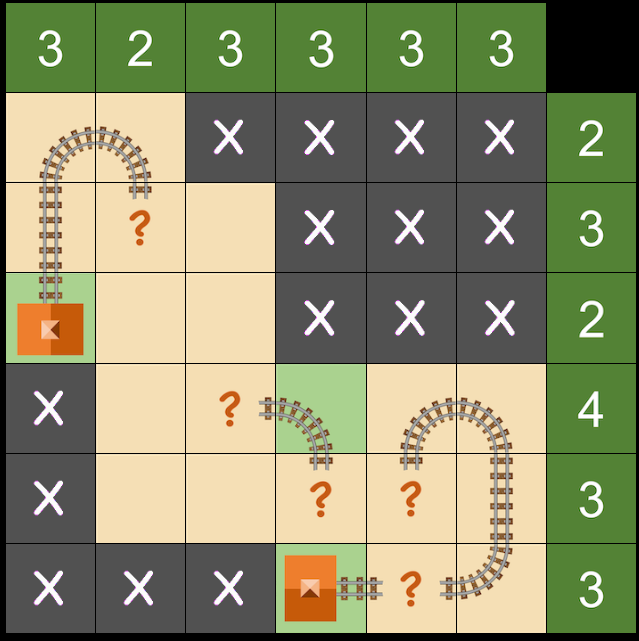
Step 10: Complete Column 2
In column 2, the required number of track pieces are completed. Mark the remaining cells with and place the track tiles in the remaining blank cells on the board.
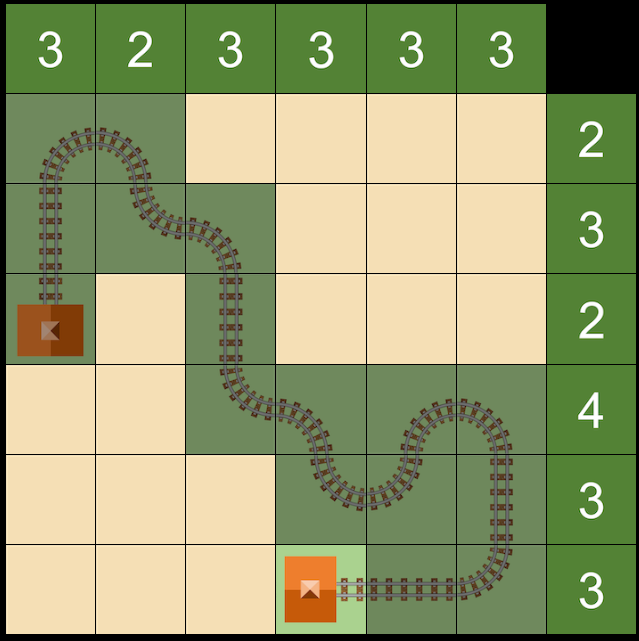
Step 11: Link the Tracks
Now, connect the tiles using the actual track pieces. This step is straightforward.
Step 12: Puzzle Solved!
Congratulations! The puzzle is now solved.
Strategies for Success
Remember, the logic tiles are there to help you out, but you can solve the puzzle with or without them. There are lots of strategies to discover, and as you play, you'll learn new ways to solve the tougher puzzles.
No guesswork or look-ahead is needed! Every puzzle can be solved with pure logic and deduction. If you don't succeed at first, don't worry – there's a new game every day!
Happy puzzling!